How to Remove Tinting From Car Window
Is your car’s window tint peeling, bubbling, or looking worn out? Old or damaged tints can detract from your car’s sleek look, reduce visibility, and violate tinting laws. Removing it can be simple and satisfying with the right tools and techniques. This guide will take you through the step-by-step process, offering tips to get your windows looking as good as new. Keep reading to restore your car’s clarity and style with ease!
Why Remove Car Window Tint?
Removing car window tint can be essential for maintaining your vehicle’s appearance and safety. Over time, old window tint often becomes discoloured or develops bubbles that detract from your car’s sleek lines. If you’ve noticed a decline in visibility or compliance with local tinting laws, now is the right time to consider car window tint removal.
- Signs of Bad Window Tint: Look for bubbling, peeling, or discoloration as indicators that your tint needs replacement.
- Visibility Concerns: Reduced clarity makes driving dangerous, especially in bright sunlight.
- Legal Compliance: Ensure your tint adheres to local regulations to avoid fines or penalties.
- Improved Protection: Newer tints offer better UV protection, preserving your skin and vehicle’s interior.
If you’re considering a change, explore MY Auto for professional window tint services. MY Auto provides premium window tinting services that enhance privacy, protect against UV rays, and maintain optimal cabin temperature, offering a seamless installation for sedans, SUVs, trucks, and vans.
Step-by-Step Guide to Removing Window Tint
Whether your car’s window tint is peeling, bubbling, or simply outdated, removing it can feel like a daunting task. But with the right approach, the process can be surprisingly straightforward. This step-by-step guide walks you through everything you need about car window tint removal, offering tips to tackle stubborn window tint adhesive and ensure a smooth, damage-free result.
Step 1: Prepare Your Workspace
Approaching this task requires a clean and safe environment. Start by rolling down your windows slightly, just enough to access the top edges of the tint without obstruction. Next, select a well-lit area for your work. Natural light helps you see what you’re doing, making it easier to check for remaining window tint adhesive after removal.
Protect your vehicle’s interior with blankets or plastic sheeting to catch any debris that might fall.
Step 2: Choose Your Removal Method
You can tackle the task using different methods, primarily through heat application or chemical solutions. Each has its benefits, so choose one that feels right for you.
Method 1: Heat Application
Using heat is both effective and efficient.
- Warm Up the Tint: Grab your heat gun for tint removal and hold it about 6–8 inches away from the surface of the tint. Let the warmth envelop the film as you move the gun in circular motions. You can almost feel the adhesive giving way as it softens, readying itself to release its grip on the glass.
- Lift the Corner: Once the edges begin to curl, take your razor blade for tint and gently slide it under a corner of the film. This isn’t just lifting; it’s about coaxing the tint free from years of bonding like a comforting hug letting go.
- Peel Away: Firmly grasp the lifted corner and slowly pull the film from the glass. Continue applying heat as you go, keeping tension on the film to avoid tearing. You’ll notice the film will start to peel away more easily.
Method 2: Ammonia Solution
If you prefer a gentler approach or are dealing with a particularly stubborn tint, an ammonia soak can be your ally:
- Mix the Solution: Take equal parts of ammonia and water and combine them in a spray bottle. The sharp scent fills the air, signalling that you’re about to take control of those pesky adhesives.
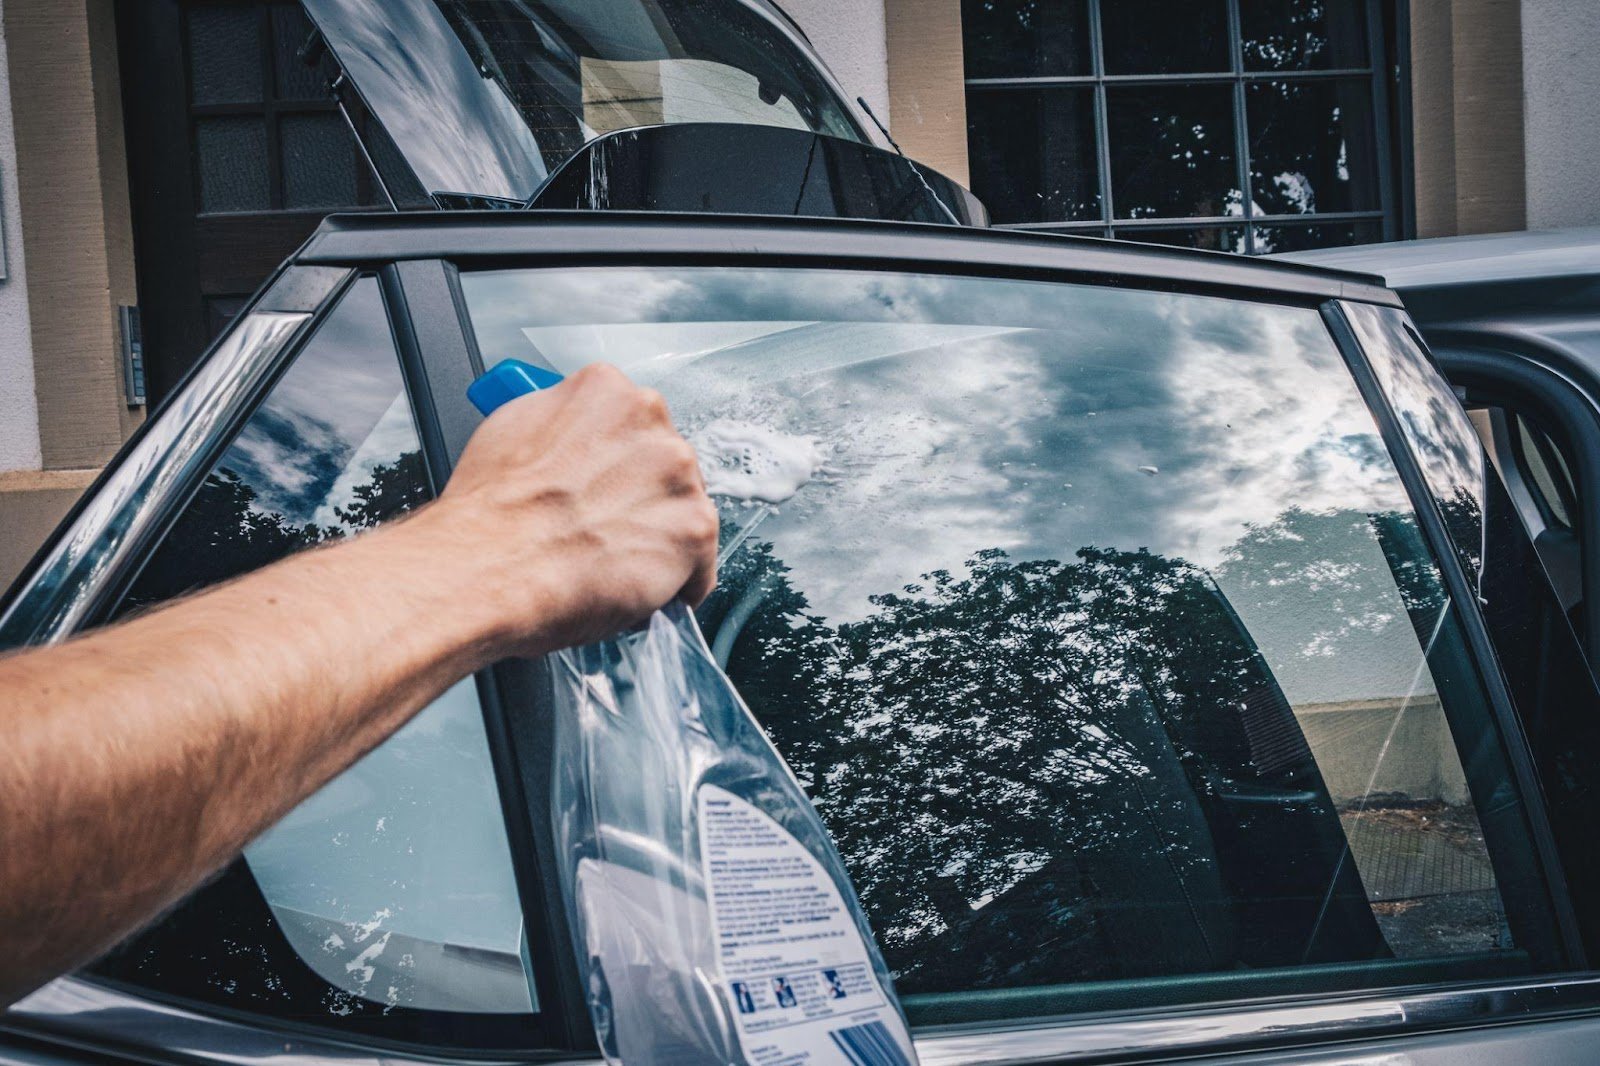
- Apply the Mixture: Generously spray the mixture over the interior of the tinted window, soaking the film thoroughly. Next, cover it with plastic wrap or garbage bags. This creates a mini sauna effect, allowing the ammonia to penetrate the adhesive while trapping heat.
- Let It Soak: Give it time—1 to 2 hours is ideal. During this wait, you might feel a sense of anticipation building. As the ammonia works its magic, you’re one step closer to unveiling sparkling clear glass beneath.
- Peel Off the Tint: After soaking, carefully remove the coverings and use the razor blade to lift a corner of the tint film. Pull gently, feeling each inch reveal the pristine surface underneath. If you encounter resistance, reapply the ammonia and let it penetrate further before retrying.
Step 3: Clean Up Residue
After removing the window film, you may notice some leftover window tint glue residue. Don’t worry—removing it is simple and completes the car window tint removal process.
- Spray and Soak: Apply glass cleaner or adhesive remover to the residue. Let it sit for a few minutes to loosen the glue, making cleaning easier.
- Wipe Away: Use a soft cloth or paper towel to wipe away the residue gently. If stubborn spots remain, reapply cleaner and scrub until the glass is spotless.
- Final Rinse: Clean the window with a soap and water solution to remove any leftover cleaning products and leave the glass sparkling.
Step 4: Inspect for Damage
Once the tint and adhesive are removed, check for any damage.
- Look for Scratches: Run your fingers over the glass edges to feel for any scratches or rough areas. These can usually be polished out.
- Check Defroster Lines: Removing tint from a rear window ensures the defroster lines are intact. If damaged, seek professional repair.
Professional Window Tinting and Care for Tinted Windows
Investing in professional window tinting enhances your car’s style, comfort, and UV protection. However, keeping your new tint looking fresh and functional requires regular care. Just as you wouldn’t neglect your vehicle’s exterior, maintaining tinted windows is essential.
Caring for tinted windows involves more than just appreciation—they can develop issues over time. Old window tint may bubble, peel, or discolour, prompting the need for consideration of car window tint removal. If you see signs of bad window tint, such as patches or poor adhesion, addressing these problems early is crucial.
Tips for Caring for Your Tinted Windows
- Gentle Cleaning: Use a soft cloth with pH-neutral soap or glass cleaner for adhesive. Avoid ammonia-based products, which can degrade the film over time.
- Avoid Abrasives: Stick to non-abrasive tools to prevent scratches. Microfiber cloths are safe and effective for cleaning without damaging the tint.
- Mind the Heat: Excessive heat can weaken the window tint adhesive. Park in shaded areas when possible, and follow instructions carefully if using a heat gun for tint removal.
- Regular Inspections: Conduct routine checks, especially after weather changes. Look for bubbling or discoloration to catch potential issues early.
Get Premium Tinting for Your Vehicle Today
Don’t let old or damaged tint ruin your vehicle’s appearance. Removing old or damaged window tints helps maintain your car’s appearance and ensures compliance with tinting laws. Understanding the process is key whether you choose DIY tint removal or professional services. Trust MY Auto for seamless, professional window tinting services.


